Create a Group in Office 365 via Exchange Admin Center or PowerShell
The Office 365 Group is a collection of cross-application membership in Exchange Online. With this group mailbox, the members can access the resources which are shared in the group. So here I am going to describe how to create a Group in Office 365 via Exchange Admin Center or PowerShell.
Method 1: Create an Office 365 group using the Exchange Admin Center
The administrator can create a Group in Office 365 via Admin Portal so here I am discussing the all the step by step solution. Just follow all the instructions to create an Office 365 Group Mailbox.
Step 1: Open the Admin Center window after login the Office 365 Administrator Mailbox. Then go to the Groups under the recipients option.
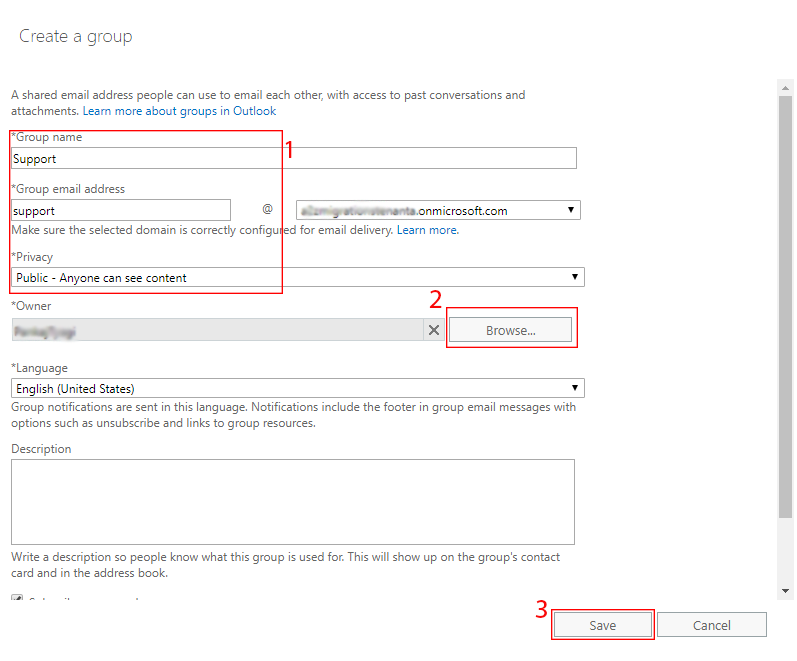
Step 2: Click on New Office 365 group and a new window will appear, here type the Group name, user name and Browse the Owner name then hit on Save.
Note: You can provide Privacy (Public or Private) according to your requirement.
Step 3: After clicking on the Save Button a window will open then go to membership >> click on “+” icon and select the members. Now hit on Add >> Ok and Save it.
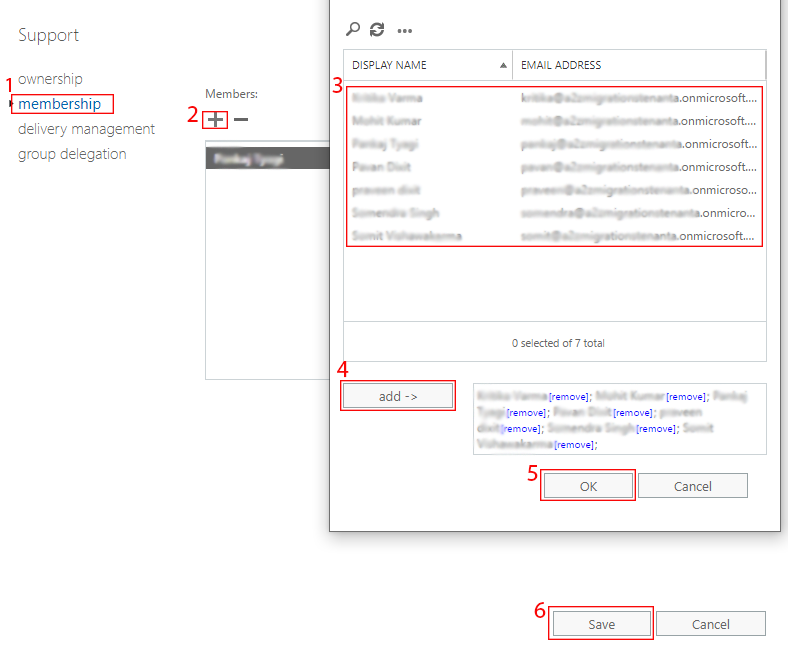
After clicking on the Save the Office 365 Group successfully created.
Method 2: Create a Group in Office 365 Mailbox through the Windows PowerShell Command.
Here you can also use the Microsoft Windows PowerShell commands for creating the Office 365 group. For this, you need to follow all the step by step command lines.
Step 1: Firstly you have to establish the connection of the Exchange Online mailbox to the PowerShell.
Step 2: Once you connect to the PowerShell you need to enter the following commands for creating the Office 365 Group.
New-UnifiedGroup –DisplayName “ITSupport” –Alias ITSupport

Now the Group has been successfully created but there is not specify that it is a Private or Public Office 365 Group.
Note: By default, the created group treat as a Public o365 Group and there are no members available excepting the group owner.
So now we will assign the Access type (public or private), add the members, and an additional Group Owner. For this put the following script step by step.
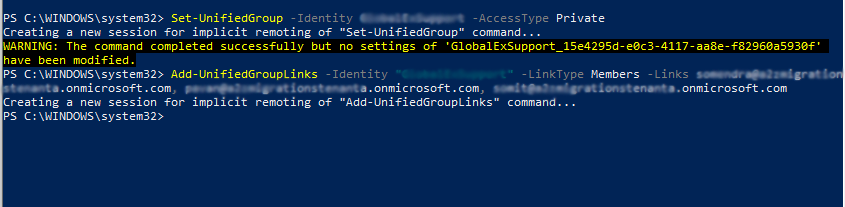
Set the Access Type (Private):
Set-UnifiedGroup –Identity ITSupport –AccessType Private
Add the Members in the office 365 Group:
Add-UnifiedGroupLinks -Identity "ITSupport" -LinkType Members -Links somendra@a2zmigrationstenanta.onmicrosoft.com, pavan@a2zmigrationstenanta.onmicrosoft.com, somit@a2zmigrationstenanta.onmicrosoft.com
For Adding Additional Owner:
Add-UnifiedGroupLink –Identity "GlobalExSupport" –LinkType Owner –Link somit@a2zmigrationstenanta.onmicrosoft.com
Note: While you are running the Add-UnifiedGroupLink command might be you will get an error (Get-UnifiedGroup’ is not recognized as the name of a cmdlet) due to the Mail Recipients permission.
You can resolve this issue by providing the Recipient Management permission. You can assign this permission through the Exchange Admin Center or by putting the given command.
Get-ManagementRole -Cmdlet Get-UnifiedGroup
Step 3: You can also check the assign Owner and the members’ list by entering the given commands.
To Show the Owner Name:
Get-UnifiedGroupLinks ITSupport -LinkType members
Get the Members Name:
Get-UnifiedGroupLinks ITSupport -LinkType members

Step 4: Now you can also remove the member or the addition owner from the Office 365 Group by running the following script.
Remove the external Owner:
Remove-UnifiedGroupLinks –Identity ITSupport –LinkType Owner –Links PankajTyagi
Delete the member from the Group:
Remove-UnifiedGroupLinks –Identity ITSupport –LinkType Member –Links pavan
Final Verdict: In the above post, I discussed each and every detail regarding the Office 365 Group mailbox. And I also explain the step by step process to create a Group in Office 365 via Exchange Admin Center or PowerShell, hope it will help you to create the o365 group. But if you still have any query or doubt regarding this blog, so just type the message on the comment box.