Increase attachment size in Office 365 Exchange Online Mailbox
By default, Microsoft provides message size limits of 25MB which has been increased to 150MB by Microsoft. This is a significant increase from the previous limit of 25MB. As you know that the text size is shorter then attachments. That’s why we face issue while we send the attachments.
For resolving these issue we can increase the limit or assign the mailbox size restriction. Here I am also going to discussed how to increase mail Attachments Size limit in Office 365. You can also manually do this performance by following the given solutions.
There are two methods to set the maximum attachment size limit. The first is by using the attractive interface of Exchange Online Admin Centre. The second way is to enlarge the mailbox email size using PowerShell.
Below I am explaining the simple steps of both the methods which you can follow to expand the mailbox email size. Follow the given steps to increase the maximum size limit of Office 365 attachment & message size.
Method 1: How to increase email attachment size using o365 Admin Portal.
Step 1: Login to Office 365 Admin account. Click on Admin Center icon and then>> Exchange.
Step 2: Go to the Recipients section of the Exchange Admin Center. In this section under mailbox option, you will find the list of mailboxes or users connected with that particular o365 cloud-platform. Select any one of them whose size limit you want to increase and click on (…) sign. After hitting on it you will find some options.
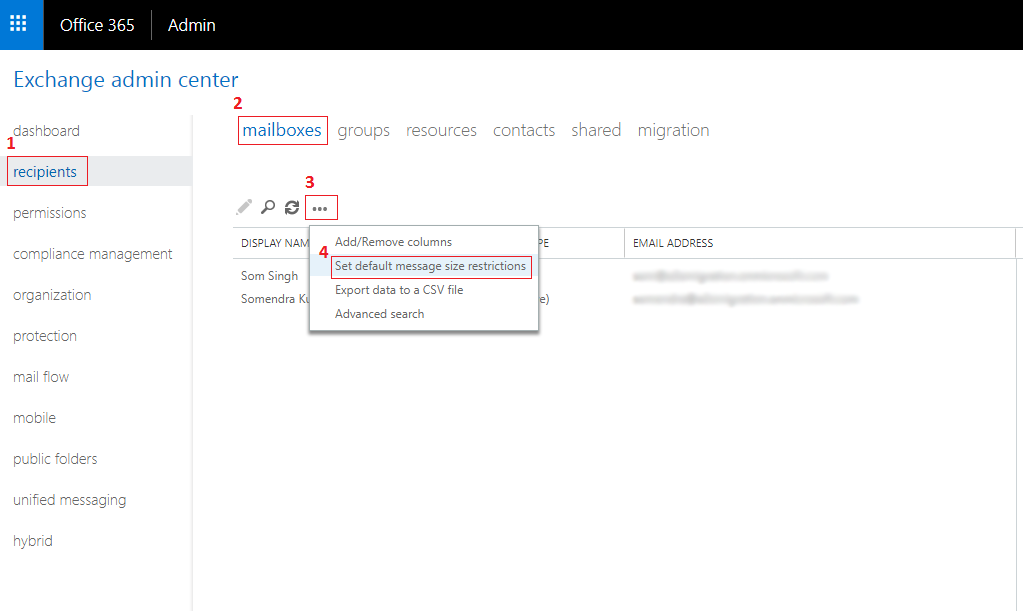
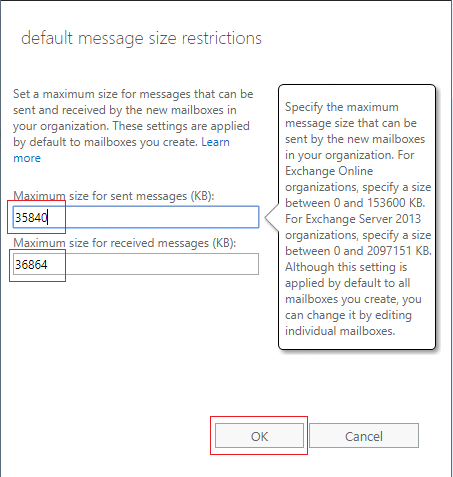
Step 3: Now go to “set default message size restriction”. As you click on it, a dialog box will appear on the screen where you will be asked to type the maximum message size up to which you want to increase for sent and receive messages. And then click on Ok. If you are running an Exchange Online organizations, the size limit is from 0 to 153600 KB. And for the Exchange Server 2013 organizations, the mailbox size limit is from 0 to 2097151 KB.
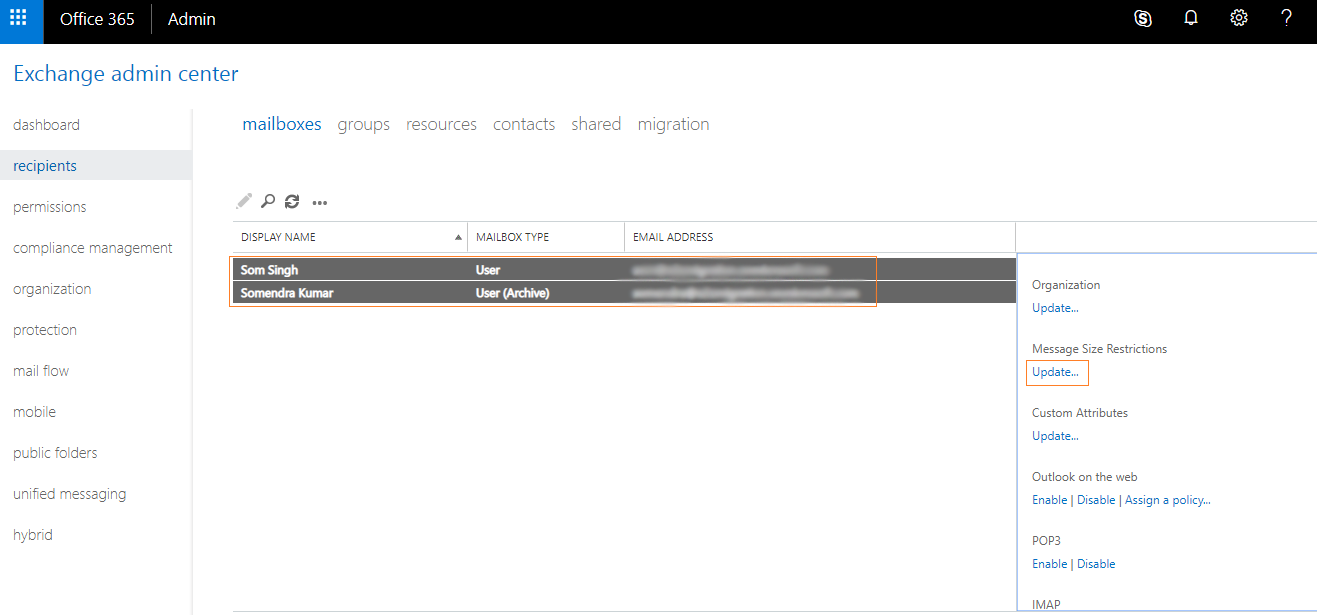
For increasing the size of the message in bulk format:
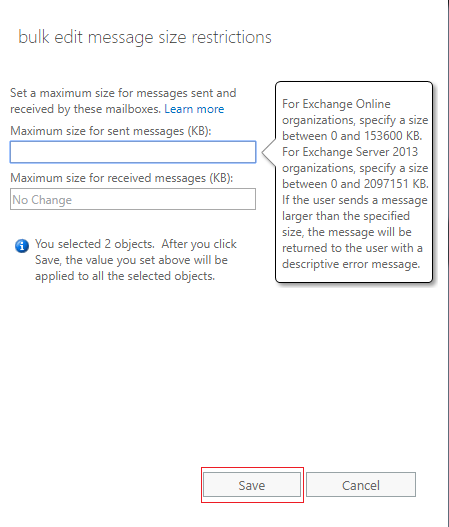
Select all the mailboxes. A Bulk Edit screen will be visible on the right side. There you will find an option “Message size restriction”. Hit on Update option below it. Again, a dialog box will appear.
Write the maximum size limit and click on Save.
Following the above steps of the first method successfully expands the size of the mailbox attachments.
Method 2: Change mail attachment size limit of Office 365 mailbox using PowerShell
This method enhances the mailbox message size in Office 365 with the use of the PowerShell where you need to execute commands.
Step 1: Connect the Windows PowerShell to the cloud platform and login with the Office 365 Admin account by executing the given command.
$Cred = Get-Credential
$Session=New-PSSession –ConfigurationNameMicrosoft.Exchange –ConnectionUri https://ps.outlook.com/powershell/ -Credential $Cred –Authentication Basic –AllowRedirection
Step 2: Run the below command to import the PSSession to Exchange Online.
Import-PSSession $Session
Step 3: Set Office 365 attachment size limit for a single user, you require to run the following command.
Set-Mailbox somendra@a2zmigration.onmicrosoft.com -ProhibitSendQuota 19GB -ProhibitSendReceiveQuota 20GB -IssueWarningQuota 18GB
Step 4: Current list of quota is attached to the mailbox.
Get-Mailbox somendra@a2zmigration.onmicrosoft.com | Select *quota
To set the maximum limit of the size of multiple mailboxes at once.
Get-Mailbox | Set-Mailbox -ProhibitSendQuota 19GB -ProhibitSendReceiveQuota 20GB -IssueWarningQuota 18GB
Wrapping Up: In this blog, I tried to explain, how to increase attachment size in Office 365 Exchange Online Mailbox. You can follow the instructions for increasing the Mailbox message size manually. If you have any question related to this then you can leave a message in the comment box provided below.